Categories
Uncategorized

Video Streaming for the Nutcracker

Over the past few years, In Sync Dance has continued to offer live video streaming as an option for family and friends who want to watch the ballet shows, but can’t make it to the show in person. As a result, I’ve continued to provide the streaming services and have grown my skills and equipment list along the way.

One of the biggest transitions was moving from an Blackmagic ATEM Mini Pro to a ATEM Mini Extreme ISO. The Extreme ISO allows recording all video inputs individually in addition to the final program output. We can then go back after the show and make a final recording to distribute to the dance families. With the original footage to remix from, if a mistake happened during filming, we are able to make corrections so the final long-term version is something we’re happy to have people watch again and again.

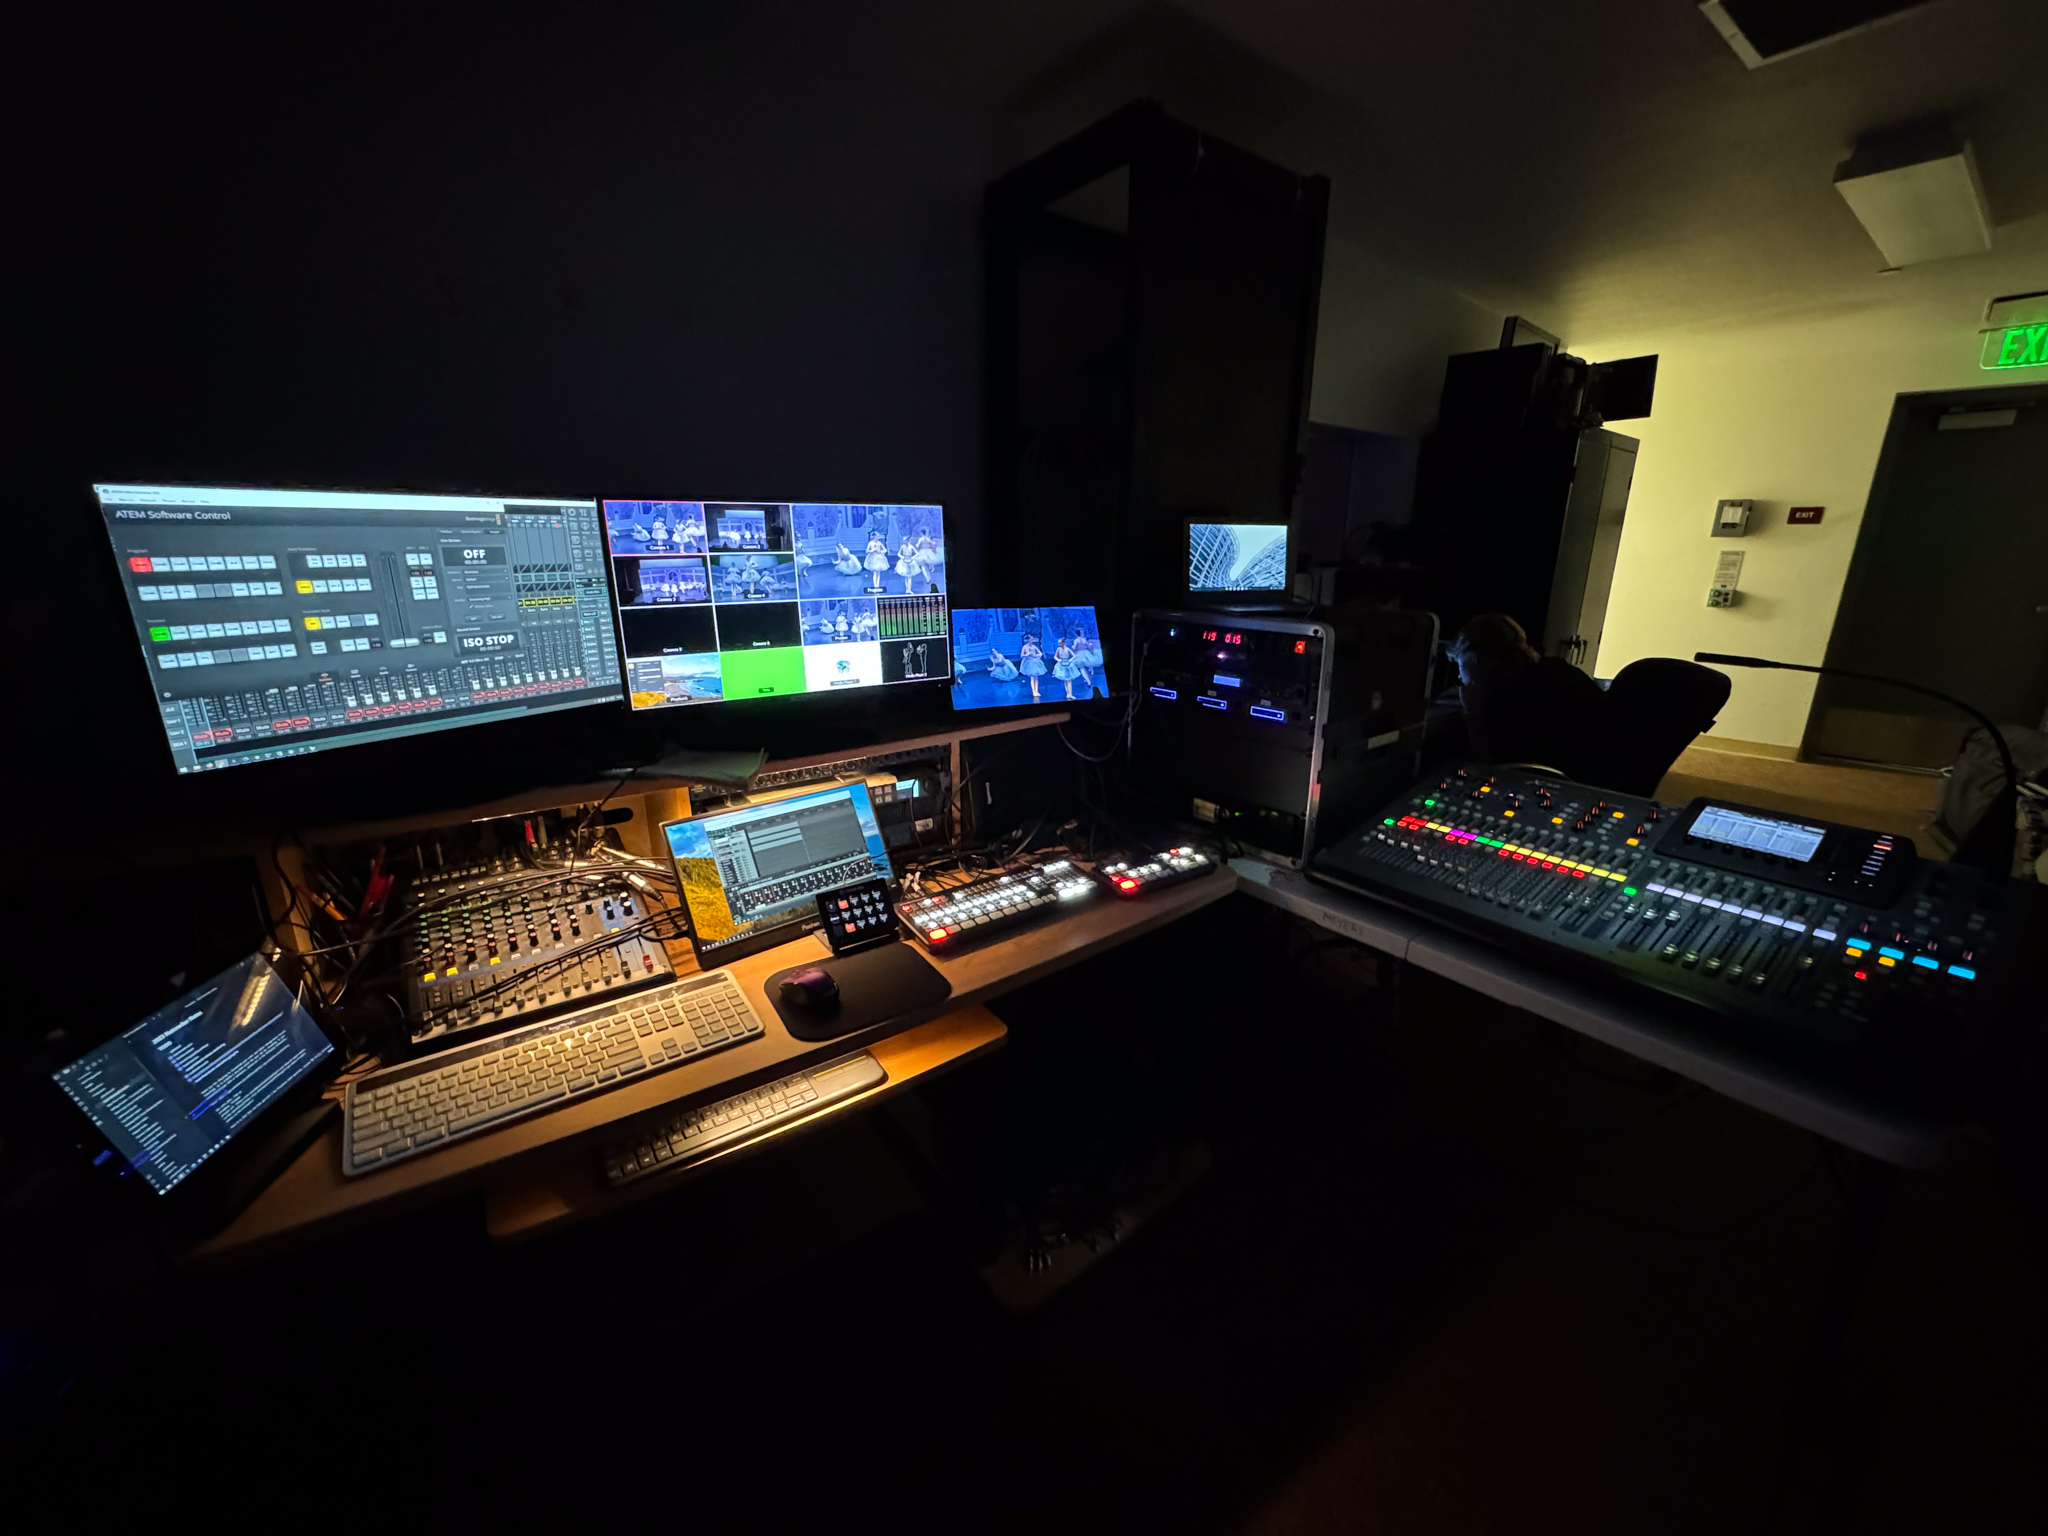
Let’s go over the control room setup based on the photo above:

On the right is a Behringer X32 mixer. The mixer is set up to take a copy by AES50 of all of the inputs from the school’s X32. I then mix the audio for the entire show to be appropriate for the stream without having to worry about affecting what the audience in the auditorium is hearing. Also on the table with the mixer is the equipment rack that houses the various computers I use for the production.

There are four monitors along the top row of the desk. First on the left is the general “control” computer monitor. This is where I run any applications for additional or more in depth control of my devices. The second screen is the multiview of the ATEM Extreme ISO, showing all camera and computer inputs. The third screen is the output of the ATEM Mini Pro, which I will describe in more detail shortly. The right screen on top of the rack is a Chromebook which is monitoring the final stream (the stream wasn’t active when the picture was taken).

On the desk level: on the left is a second screen for the control computer. This screen is commonly used for script notes. White keyboard is for the control computer. Next is the third screen for control. This is a touch screen, so useful for things like adjusting mixing or running additional cues. In front of the screen is a Streamdeck, used for triggering macros using Bitfocus Companion. The ATEM Mini Extreme ISO for the primary show switching. ATEM Mini Pro is the final item on the desk.

The program output of the ATEM Extreme is fed to the school’s SDI network, so performers backstage can know what is happening in the show and where in the script the show is. However between the Extreme and the SDI network is the ATEM Mini Pro. This is used so I can have an additional means of controlling the SDI network and in particular, I can overlay text for communicating backstage. For example, I put a countdown clock to show time that only the backstage can see.

The video stream to the Internet originates in the ATEM Extreme and is encoded in-device. OBS isn’t used for this event’s stream. The stream is carried over EventLive, which was suggested to us by the ticketing provider. EventLive is simple to work with and has offered us high reliability and video quality for an affordable price per show.

There are three computers in the rack. First is the control computer, running Companion and other device control software. The second is connected to the Extreme and provides video playback using VLC, titling using H2R Graphics Pro on a second HDMI output, and backstage text also using H2R on a third HDMI connected to the Mini Pro. The third computer is exclusively used for recording; OBS if needed for video, Reaper for multitrack audio.

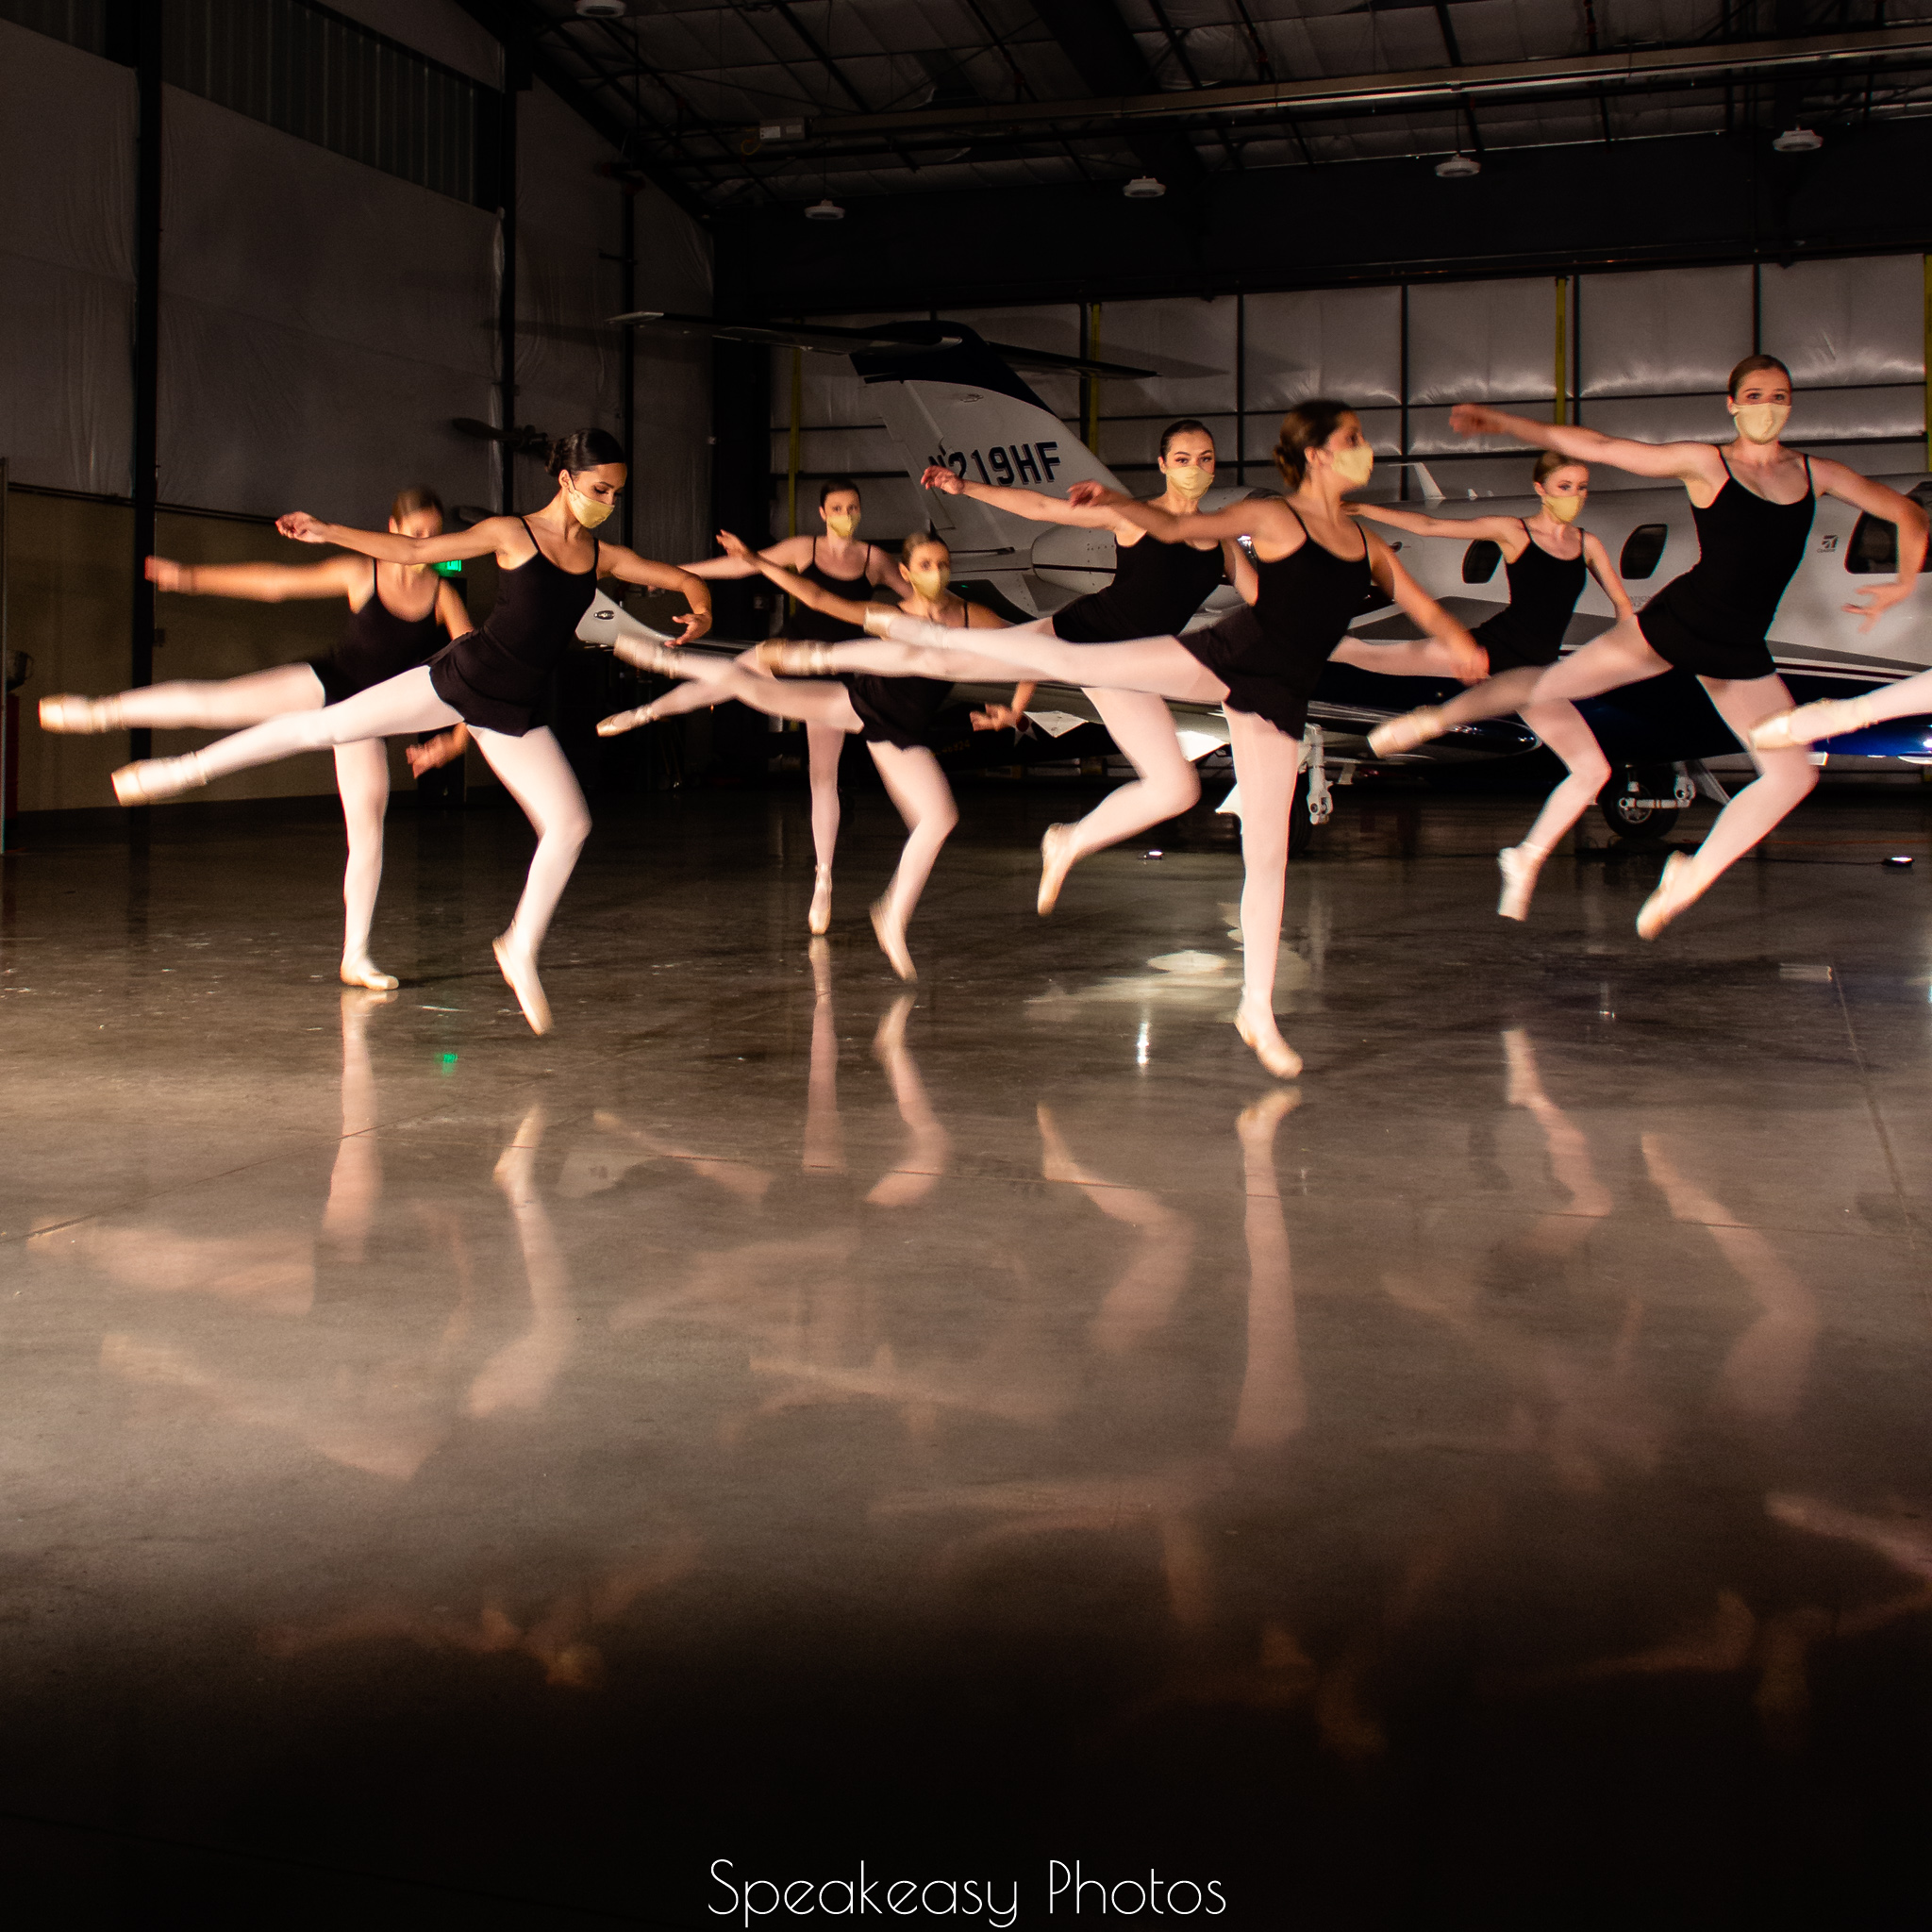
For this show, we utilized 5 cameras. One static shot from the sound booth at the back of the auditorium. Two cameras were on tripods and staffed by high school students at the back corners of the auditorium. The final two cameras are the school’s Canon PTZ cameras, one located in the sound booth, the other down stage center. If you look closely at the top photo above, you can see my son in the background looking at the computer screen controlling the two PTZ cameras.

One very handy piece of equipment I picked up right before the start of this show is a Lumantek SDI to HDMI Converter with Display. I attached a 9v battery to the side of it and it allowed me a very compact way to test SDI cable runs without needing to carry larger converters, screens, and batteries to power them all. The projector I set up in the school cafeteria was at the end of a 200′ SDI cable run, which was a bit marginal for signal quality. I was able to use the Lumantek to validate all connections before setting up the projector.

That being said, for the upcoming show I purchased a SDI to fiber adapter set. So the long run to the projector will be over armored fiber instead of coax cable, which will be a lot more reliable.

A final picture showing what the room looked like during setup on the rehearsal day:

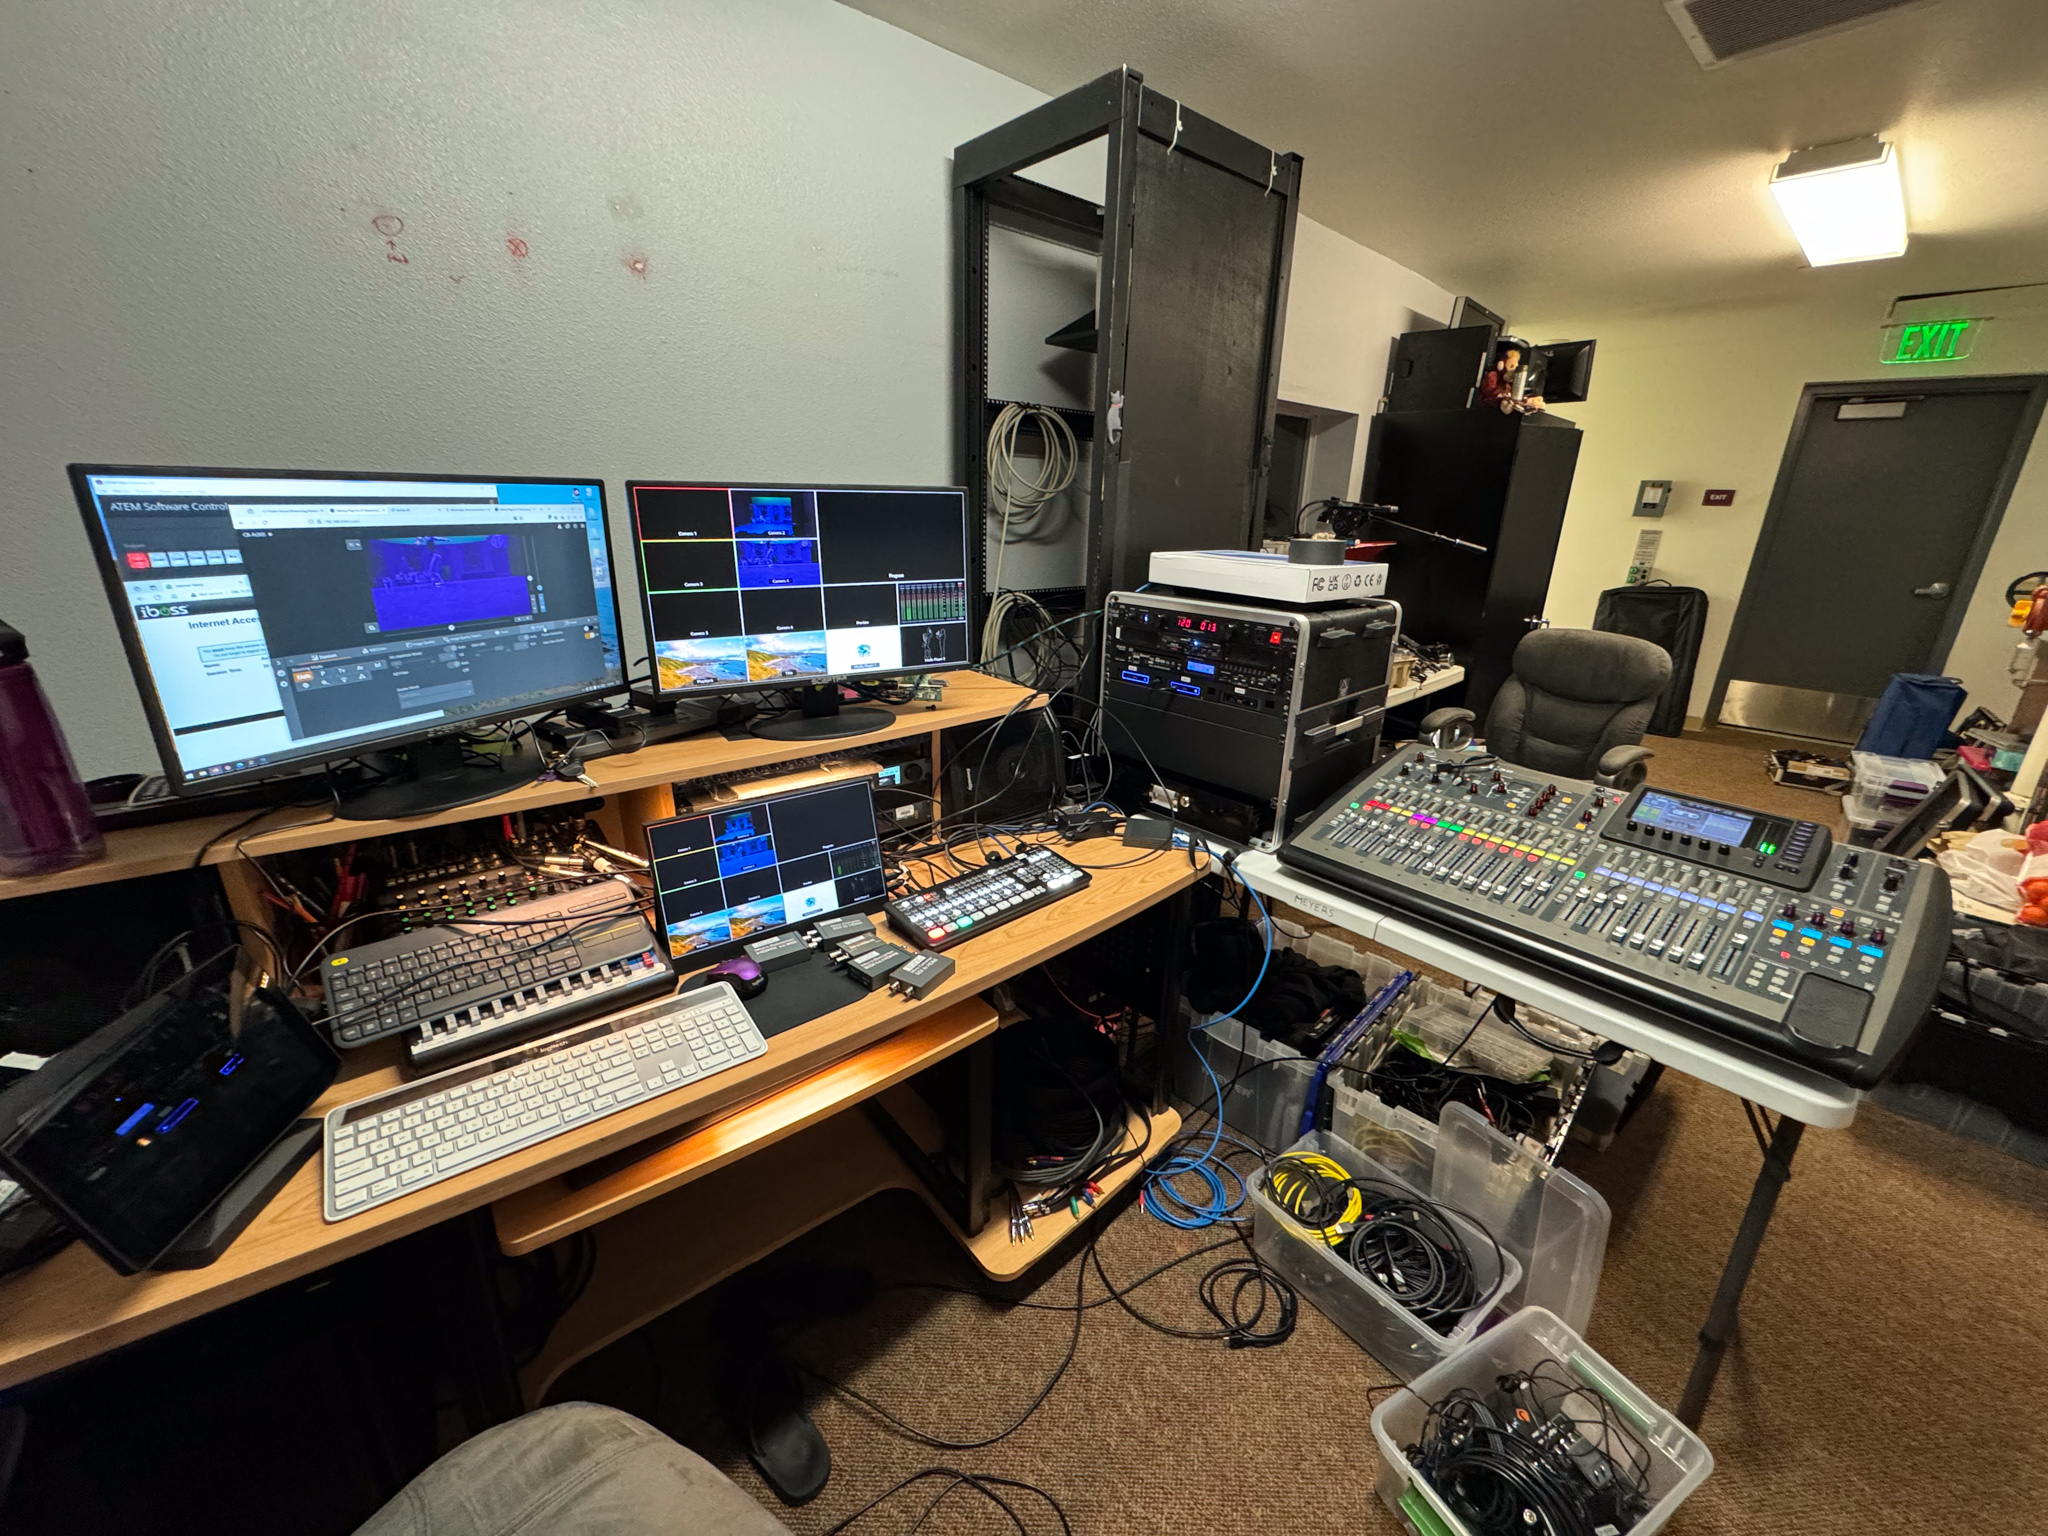
Additional equipment in the background belongs to the high school. I do use the school’s cameras and wiring, but the rest of the gear is not used by me for the shows. I simply overlay my setup on theirs and utilize the shared space.

Categories
Video Streaming

Live Video Streaming for In Sync Dance

This past weekend I produced the live portion of In Sync Dance of Auburn’s virtual showcase. As all theaters have been closed to audiences for over a year, the studio decided to move the performances outdoors and film each class separately. That way the student’s work could still be shown, but with accommodation for distancing and keeping group sizes small.

Ultimately an hour and a half worth of video was created in music video-like format. To share the video with the world, the studio decided to produce a live stream event in partnership with Keaton’s Child Cancer Alliance. Keaton’s is the studio’s charity partner. The live stream premiered with people talking in real time, PowerPoint slides pre/post show, various videos played, viewer submitted “watch party” pictures, and finally all of the dance performance videos.

At the end of the day, the live stream performed well with minimal hiccups. Feedback has been positive all around.

Here’s how I set up everything to make the stream happen:

At the core of the stream is a Blackmagic Design ATEM Mini Pro. The ATEM was used to mix all of the various video sources together. All four HDMI inputs were used for different sources:

  1. Camera
  2. PowerPoint computer
  3. Playback computer
  4. Titling computer

Audio was handled by my Behringer X32 mixer. I decided to do all audio external to the ATEM as I prefer having more control than what the ATEM provided. Audio was routed from Main mix to Matrix 1 & 2 for additional tuning, then ultimately sent out the Aux 5 & 6 outputs on the back and into Mic 1 on the ATEM. I had to set the ATEM to accept line level audio sources. I didn’t like that I needed to supply audio to the ATEM over unbalanced stereo 1/8″ connectors. But in the end, the audio was clear and intelligible, so it ended up not being a big deal.

Microphones were simple wireless lapel models, with wireless hand mics on and nearby if needed. The receivers were located in the studio room and connected to a Behringer SD8 stagebox. This enabled carrying the four microphone channels back to the control room over a single CAT-5 cable. 100ms of delay was applied to each microphone channel to align the audio with the delays of the video signal.

The camera was a Canon VIXIA HF R800, chosen as it provides a “clean HDMI” output (video only, no extra menus or such on the HDMI connection). From the camera, a HDMI to SDI converter was used to send the video signal over a longer cable run. At the control room, a paired converter was used to convert the signal back from SDI to HDMI and ultimately fed the ATEM on channel 1.

PowerPoint was provided by using one of the studio’s staff computers, connected through HDMI. Music during the PowerPoint was a phone playing a selection of free to use music passed into the mixer on Aux 1 & 2.

Playback was provided by a spare computer I had. I installed VLC and enabled the Web interface. A playlist was created with all video segments set in order, so it was easy to pick which video to play based on index numbers within the playlist. The web interface also allowed easy control of play/pause, full screen, and other settings without risking showing controls on the screen during playback to the audience. Audio for playback was handled by an attached Behringer UCA222 USB interface connected to Aux 3 & 4 on the mixer. I tried using HDMI embedded sound at first, but the computer kept on being troublesome, so a separate interface was needed. I mapped Channel 15 & 16 on the mixer to receive audio from Aux 3 & 4 so I could have all inputs on a single layer of the mixer for quick access.

Titling used H2R Graphics. This program enabled us to run a countdown timer before the actual live portion began, a ticker for contact information, and selected YouTube comments all to be overlaid on top of the camera feed. The ATEM’s upstream keyer was used to chroma key the titling input on the camera feed. While titling this was worked out well, next time I need to learn how to enable titling using the downstream keyer, as it’s annoying to have to manually re-enable the keyer each time I changed video sources on the ATEM (ATEM macros were very spotty with enabling the keyer too and couldn’t be relied upon).

The ATEM HDMI output was fed to an HDMI splitter, providing the control room with a view of everything, but also feeding an HDMI to SDI link back to a monitor under the camera so the talent could also see pictures about to be featured or YouTube comments that we popped up on screen.

USB-C output of the ATEM was fed to a dedicated computer running OBS Studio for final encoding to YouTube at a 4500Mbps constant bit rate. I tried to use the ATEM’s built in encoder for the backup connection, but YouTube wants identical streaming parameters and I couldn’t get the ATEM configured properly. The initial motivation for using OBS was to enable closed captions for Deaf members of our audience. Captioning was performed using Web Captioner. I tried both the OBS integration and the YouTube (HTTP) integration and found that the HTTP integration provided a better result. That being said, YouTube’s captions were missing a lot of content that was being shown in Web Captioner coming from the source.

Showing how captions appeared to viewers

Final control over everything was provided by an additional computer running Bitfocus Companion and an attached Elgato Stream Deck. When I first learned about the Stream Deck a year ago, I thought it was silly. But seeing some YouTube videos about it’s usefulness during streaming I decided to give it a try. This tool changed everything and made the event very smooth. I was able to set up buttons to do things like switch to the camera on the ATEM and unmute the mic DCA on the X32. Another button changed to the playback input, faded to it, muted the mic DCA and unmuted the playback DCA. Additional buttons were used to select each video segment for quick access.

During earlier iterations of getting ready for this event, I purchased a Blackmagic Designs HyperDeck Studio Mini thinking this would be perfect for playback. It offers a high quality picture and control by the ATEM. But I decided to not use it as it was a huge pain trying to figure out the right export settings in DaVinci Resolve to play back properly. Most exported files I created simply refused to play, despite both the deck and the software being made by the same company. And the deck refuses to play H.264 created by anything other than itself. So the HyperDeck was out of the picture.

I then heard about PlayoutBee and thought that could solve the playback needs. Unfortunately it acted weird and Companion had a hard time keeping connected to it. Plus there were other smaller bugs that added frustration, such as the mouse pointer appearing on the screen over video. I had to attach a mouse, move it so it would disappear, then disconnect the mouse. Another odd behavior was the lack of scaling; if I played a 4×3 video, it would zoom the video so the horizontal was full width, but this meant much of the vertical portion of the video was being rendered off screen. And if I played a wider than 16×9 video, there was a huge black bar at the bottom of the screen; it didn’t center the video within the top and bottom providing a centered letterbox like we normally expect. Some H.264 files would play and others would not, despite all being encoded by Handbrake. So with the general unreliability, I decided to use VLC on a dedicated computer.

Longer term, I’m going to see how I can repurpose the Raspberry Pi 4 that I purchased to use with PlayoutBee to instead automatically run VLC in Web mode instead of needing to carry my extra full Windows computer for the task. Hopefully in the future, H2R Graphics will also have a Raspberry Pi version and that will be another computer that can get simplified.

Thankfully with much practice and prep work ahead of time, I knew when I arrived what I needed to bring, how to set everything up, and how to make everything work together. The prep time paid off with a smooth production that looked good, sounded good, and flowed smoothly for our audience.

Categories
Uncategorized

Hardware for WFH Conferencing

There’s been a lot of discussion lately about working from home. So to help make conference calls go well for everyone who is hearing me, this is the hardware I use.

When I’m at my desktop computer, I use a desktop microphone that has a hardware mute button. My current choice: Fifine Desktop Gooseneck Microphone. Audio out is provided by my stereo plugged into the computer.

Google Meet does a good job of doing echo cancellation since I’m using separate devices for in vs out. Amazon Chime however doesn’t and folks experience a lot of echo when I use this setup.

When I need more privacy, I use a gaming headset (also with a hardware mute switch): Logitech G933.

As for the camera, I like the Logitech C920S HD Pro Webcam. I have used a Logitech C270 Webcam in the past, but the field of view is really narrow on that latter one and makes me look like the Wizard from the Wizard of Oz.

Because I like looking halfway decent on camera, I also have a video light. VILTROX VL-162T CRI95+ LED Video Light is my light of choice. You’ll want to get the external power supply, as the battery only lasts about an hour between charges.

When I’m out of the house and taking calls from my phone, Giveet Trucker Bluetooth Headset is my current favorite, which also has hardware mute (starting to see a pattern yet?).

Categories
Amazon Web Services

Custom CA Certificates in AWS WorkSpaces

I use an AWS WorkSpace for a Windows remote desktop, connecting to some systems that have a custom CA. As the WorkSpace is managed by a domain, simply installing the CA certificates as usual doesn’t work. After much frustration, I figured out the right steps to manually add a CA cert.

  1. install Group Policy Management Console by opening an Admin PowerShell and running: Install-WindowsFeature –Name GPMC
  2. Run GPMC: gpmc.msc
    • Set up Group Policy Object, following Install the Group Policy Administrative Template
    • Open the new WorkSpaces Machine Policies
    • Go to Computer Configuration -> Policies -> Windows Settings -> Security Settings -> Public Key Policies -> Trusted Root Certification Authorities
    • Right click, select Import…
    • Follow wizard prompts
    • Log out then back in
Categories
Amazon Web Services EC2 SysAdmin

Instance Store HVM AMIs on EC2

Over at the SmugMug Sorcery blog I wrote a new post about creating instance store HVM AMIs: http://sorcery.smugmug.com/2014/01/29/instance-store-hvm-amis-for-amazon-ec2/.

Categories
SysAdmin

Cloning Mercurial repos with a server-side hook

I use mercurial for my personal projects. I run mercurial-server. I wanted to have a hook on the server that would clone the repository so additional tasks could be performed against the contents of the repository without affecting the server’s repository.

I started by creating a hook script at /var/lib/mercurial-server/repos/somerepo/.hg/push-hook.sh:

#!/bin/bash

PUSH_COPY="/var/lib/mercurial-server/checkout-for-push/somerepo"
if ! [ -d $PUSH_COPY ] ; then
echo "CLONE: $PUSH_COPY"
/usr/bin/hg clone /var/lib/mercurial-server/repos/somerepo $PUSH_COPY
else
echo "UPDATE: $PUSH_COPY"
/usr/bin/hg pull -R $PUSH_COPY -v -u
fi

echo "do more work here..."

Then I added the following to /var/lib/mercurial-server/repos/somerepo/.hg/hgrc:

[hooks]
changegroup = /var/lib/mercurial-server/repos/somerepo/.hg/push-hook.sh

This got me to the point of being able to check out the server repository but updating it failed with the following message:

remote: UPDATE: /var/lib/mercurial-server/checkout-for-push/somerepo
remote: pulling from /var/lib/mercurial-server/repos/somerepo
remote: searching for changes
remote: 2 changesets found
remote: adding changesets
remote: calling hook outgoing.aaaaa_servelog: mercurialserver.servelog.hook
remote: transaction abort!
remote: rollback completed
remote: abort: outgoing.aaaaa_servelog hook is invalid (import of "mercurialserver.servelog" failed)

After a lot of digging and Google searches, I wasn’t coming up with any answers. One person mentioned that an environment variable may be set wrong, causing errors. Once I dumped the environment variables out, I unset each one at a time to see if any were causing problems. I ended up needing to add unset HGRCPATH to the top of the hook script before any hg commands run. So my push script now looks like:

#!/bin/bash
unset HGRCPATH

PUSH_COPY="/var/lib/mercurial-server/checkout-for-push/somerepo"
if ! [ -d $PUSH_COPY ] ; then
echo "CLONE: $PUSH_COPY"
/usr/bin/hg clone /var/lib/mercurial-server/repos/somerepo $PUSH_COPY
else
echo "UPDATE: $PUSH_COPY"
/usr/bin/hg pull -R $PUSH_COPY -v -u
fi

echo "do more work here..."

And the output of a push command now looks a lot better:

pushing to ssh://hg@hg.example.com/somerepo
searching for changes
remote: adding changesets
remote: adding manifests
remote: adding file changes
remote: added 1 changesets with 1 changes to 1 files
remote: UPDATE: /var/lib/mercurial-server/checkout-for-push/somerepo
remote: pulling from /var/lib/mercurial-server/repos/somerepo
remote: searching for changes
remote: 3 changesets found
remote: adding changesets
remote: adding manifests
remote: adding file changes
remote: added 3 changesets with 3 changes to 2 files
remote: resolving manifests
...
Categories
Puppet SysAdmin

Scaling Puppet in EC2

Over at the SmugMug Sorcery blog I posted about how we scale puppet in Amazon EC2: http://sorcery.smugmug.com/2013/01/14/scaling-puppet-in-ec2/. You should definitely take a look.

Categories
Amazon Web Services EC2 SysAdmin

Allowing Ping to EC2 Instances

Ping is not enabled to ec2 instances by default. A lot of guides tell you to simply allow all ICMP traffic through in the security group configuration. That is overkill. Simply add the following two rules to your security group and pinging the instance will work:

Custom ICMP rule -> Type: Echo Request
Custom ICMP rule -> Type: Echo Reply

While opening up additional ICMP types may be harmless, I always like to error on the side of only allowing what I explicitly want rather than allowing everything.

Categories
SysAdmin

Bridging Networks using TP-Link Routers

Recently I wanted to set up a wireless network bridge between my garage and house without running any Ethernet cables. To do this I purchased a TP-Link TL-WR841ND 300Mbps Wireless N Router with hopes that it could talk to my existing router/access point in the house. The TP-Link supports a mode called WDS which enables bridging two or more wireless LANs.

When WDS is enabled, it causes the remote access point to act as a bridge for both wired and wireless clients. This way a network can easily be expanded without a lot of trouble of extra wiring. Wireless clients can connect to the remote access point and benefit by the increased wireless coverage area as well.

I first tried associating the garage router with my existing TP-Link DSL modem/router, but it turns out that a remote bridge must connect using WEP encryption instead of WPA2, so that wasn’t secure enough for my desires. Testing using WEP showed the bridge working exactly as expected.

To get WPA2 encryption working, I tried associating the remote access point with a 2wire router also in the house. The WDS connection was established, but the firewall in the 2wire would not allow connections to any devices other than the access point.

So in an attempt to combine the two methods, I purchased a second TL-WR841ND wireless router to live in the house and provide the final hop to the Internet for the remote access point.

To set up the network, I first connected the new house access point directly to a computer with an Ethernet cable, opened http://192.168.1.1/ on a browser, and made the following configuration changes:

  • Under the DHCP tab, select Disable for the DHCP server, then click Save.
  • Under the Forwarding -> UPnP tab, click the Disable button.
  • Under the Wireless -> Wireless Settings tab, enter the following settings:
    • SSID: name of new (bridge) network
    • Region: enter the appropriate region for your location
    • Channel: enter the number of the least-congested channel in your area
    • Mode: 11bgn mixed
    • Channel Width: Auto
    • Max Tx Rate: 300Mbps
    • Enable Wireless Router Radio: checked
    • Enable SSID Broadcast: checked
    • Enable WDS: unchecked (WDS is only enabled on the remote access point)
    • Click Save
  • Under the Wireless -> Wireless Security tab, enter the following settings:
    • SelectWPA-PSK/WPA2-PSK
    • Version: WPA2-PSK
    • Encryption: AES
    • PSK Password: chose a password for your network
    • Group Key Update Period: 0
  • Under the Network -> LAN tab, enter an IP address for the new access point, click Save, then click reboot.

Once that was done, I was ready to connect the new house access point into the network using one of the four LAN Ethernet ports on the back of the device. I connected to the new access point using a laptop to verify that everything was working as expected, then moved on to configuring the garage access point.

The garage access point is configured similarly to above, with only a few changes:

  • Under the DHCP tab, select Disable for the DHCP server, then click Save.
  • Under the Forwarding -> UPnP tab, click the Disable button.
  • Under the Wireless -> Wireless Settings tab, enter the following settings:
    • SSID: name of new remote AP network
    • Region: enter the appropriate region for your location
    • Channel: same as house AP
    • Mode: 11bgn mixed
    • Channel Width: Auto
    • Max Tx Rate: 300Mbps
    • Enable Wireless Router Radio: checked
    • Enable SSID Broadcast: checked
    • Enable WDS: checked
    • Click Survey to find the access point created above, click Connect to connect to the house AP
    • Key type: same as house AP
    • Password: same as house AP
    • Click Save
  • Under the Wireless -> Wireless Security tab, enter the following settings:
    • SelectWPA-PSK/WPA2-PSK
    • Version: WPA2-PSK
    • Encryption: AES
    • PSK Password: chose a password for your network
    • Group Key Update Period: 0
  • Under the Network -> LAN tab, enter an IP address for the new access point, click Save, then click reboot.

I then connected a computer to the garage access point using an Ethernet cable and suddenly, I was online through the bridge. I also tested a wireless connection with the garage AP and was able connect to the Internet using the remote wireless as well.

Now all devices on the network are able to communicate (including wired-only devices in the garage, thanks to the built-in 4-port switch). This enables me to move my extra devices to the garage and remove some noise from the house.

Using WDS ended up being relatively simple, but I must warn you that WDS does not work very well across different vendors (or even different models of the same vendor as I found above). I recommend using all of the same model of access points to have this work best.

Categories
Email SysAdmin

Delisting as a spammer

To help a service get unlisted by a spam block list, try the following addresses for each blocking service:

To get in touch with many major ISPs, these links are of help:

ISP Postmaster Feedback loop Whitelist
AOL Postmaster FBL Whitelist
Comcast Postmaster FBL
Hotmail / MSN Postmaster FBL

I will add to this list as I find more resources that I’m actually using for delisting. Another good source for information on feedback loops is Word to the Wise.